The finished measurements are 14h x 12w x 3 deep- a nice size tote. It has 3 inner pockets.
Here's what you will need:
18- 3" squares for patchwork
8" x 15 1/2" piece for front bottom
15 1/2" x 15 1/2" piece for back ( I chose not to put the patchwork on the back)
2- 15 1/2" x 15 1/2" pieces of lining
2- 6 1/2" x 15 1/2" pieces for inside pocket ( I used one from the lining fabric and one from the ticking- I like a bit on contrast in the pocket)
1- 6 1/2" x 15 1/2" piece of interfacing for pocket
2- 15 1/2" x 15 1/2" pieces of interfacing for main bag body ( I love fusible fleece!)
4- 1 3/4" x 27" pieces for straps
2- 27" pieces of nylon webbing for straps
Above are the front and back pieces . You will sew your 18 squares together in 3 rows of 6 each, then add the front bottom piece to that and attach your interfacing to each front and back piece. I love the fusible fleece- it is easy to use and gives a nice feel to the bag.
Sew the 2 pieces of pocket fabric together- with your interfacing inside, turn right side out and topstitch one edge of the pocket piece (this will be the top of the pocket). Sew the pocket to one piece of your lining fabric- about 3-4 inches from the top- sewing along the sides and the bottom, then divide the pocket in 3 sections and sew from bottom to top of the pocket to make the 3 divided sections of the pocket- make sure to backstitch at the top to make this secure. Set this aside for later.
Sew the front and back pieces together at the bottom seam- I usually do 1/2" seam allowances. Press open and then I like to topstitch on either side of the seam on the right side.
Sew the side seams, press open and then take the bottom seam and the side seam- match them up in this form, measure in from the point 1 1/2", draw a line and sew on the line- I double sew it for strength. Trim to 1/4". This will give you the boxed bottom.
Turn right side out and it can stand up! I also like to stitch along the very bottom to make the box a little sturdier.
Now- the straps...sew 2 pieces right sides together ( you will have 2 straps) turn right side out and then take the 2 nylon webbing pieces and bring them through the straps (put a piece of tape on the end- it goes through easier) This gives the straps much more stability. Topstitch on each side of each strap. Baste the straps in place on the outside of the bag body.

Sew the bottom of the lining- but leave a hole about 6-8" so you can turn the bag out later. Make the same boxed bottom as you did on the main pieces. Sew sides.
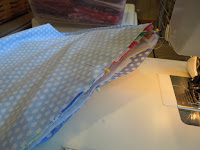
Place the main bag inside the lining- right sides together. Sew around the top...1/2" seam allowance all the way around.
Pull the main bag through the opening in the lining. Once it is all the way through you can close that hole- just machine stitch close to the edges. Press everything well then topstitch around the top of the bag about 1/4" from the edge.
All done!!! Go shopping with your new tote!


